ehwtrcLocation /home/trz/ ehwtHomeLocation /home/trz/ehwthome/NOTE: make sure they end with /
ehwtrcLocation C:\Program Files\eh\ehwt\ ehwtHomeLocation C:\Program Files\eh\ehwt\home\NOTE: make sure they end with \
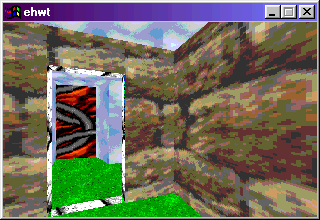
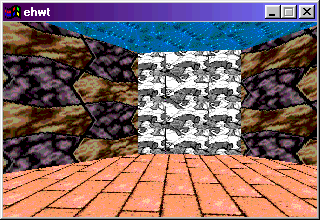
Here's a screenshot of what the first room looks like from within ehwt/ehwtwin. The white wall directly ahead is the wall we'll be tunnelling through:

Now start ehed to create a new room from the first room:
NOTE: Before using ehed, you should have successfully connected to the world you want to edit via ehwt or ehwtwin; ehed looks only at the local world cache, which will be empty unless you've successfully connected to that world at some point.
NOTE: If you're using ehed to edit your miniMOO home world, see the section below for special instructions. The following applies only to using ehed to modify ehMOO worlds.
Start ehed:
java ehedAssuming you're connecting to the virgin ehMOO core, you should see an octagonal room in the right pane after selecting yourmoo_11111 in the left pane.
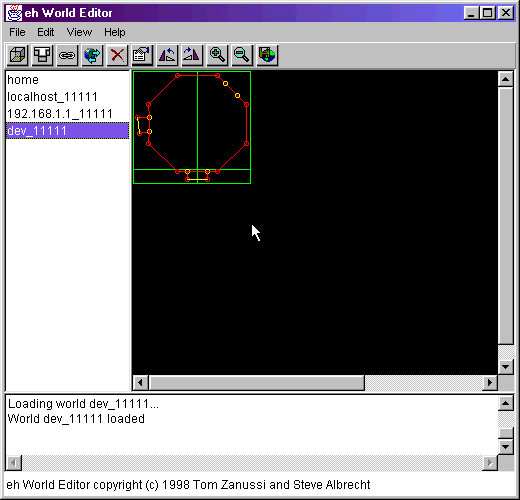
Select the menu item:
Edit | Import eh roomNavigate to the testworlds subdirectory, and select secondroom.eh. In the dialog box that pops up, give the new room a name and description. Ignore the Room Adjacency List field for now. Press OK.
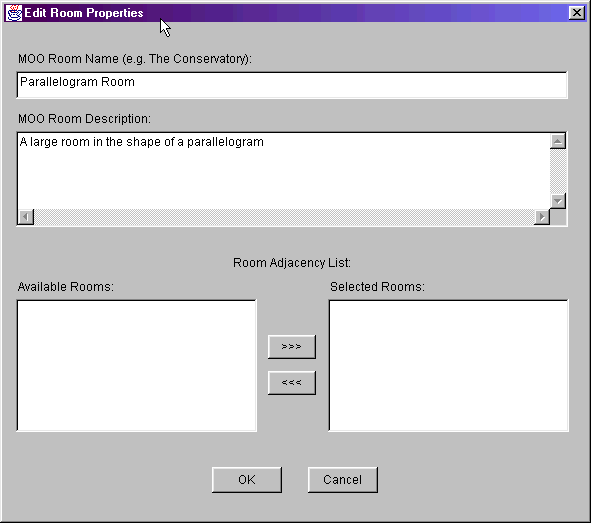
A new room shaped like a parallelogram should appear to the NE of the existing room.
The original room has two yellow vertices on the NE wall, and the new room has two vertices on its SW wall. These four vertices will be used to create a passageway between the two rooms. Do a multiple select of these 4 vertices (left-click each one while holding down the SHIFT key) - they should turn green to indicate that they're selected, and there shouldn't be anything else selected.
Select the menu item:
Edit | Add new exitIn the dialog that pops up, leave everything as is except the bottom 2 fields. The 'exit spec' is what players will use when textually connected to move between the rooms e.g. north, up, etc. Fill these in for both directions - because the new room is positioned NE from the old one, 62 to new_room_1 exit spec should be northeast,ne (either northwest or ne) can be used, and new_room_1 to 62 exit spec should be southwest,se:
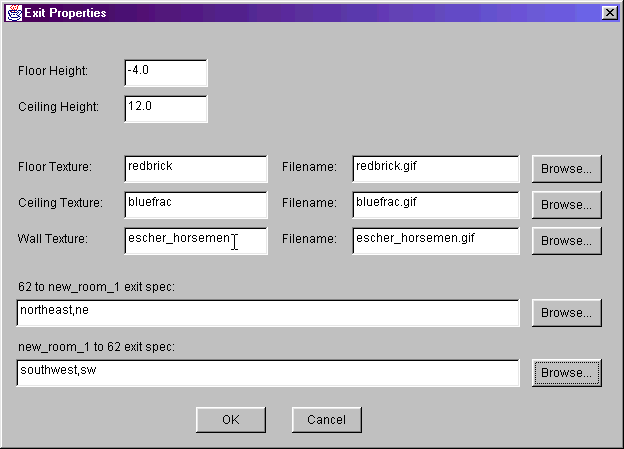
Press OK. You should now see two pink lines connecting the rooms:
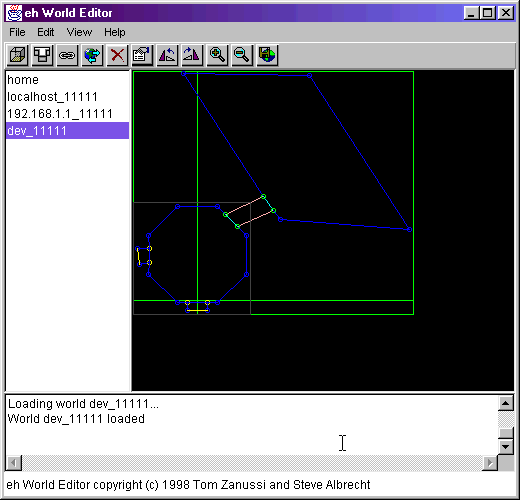
You're now ready to submit the change to the MOO.
Select the menu item:
Edit | Log onYou should see some text in the bottom message window indicating a successful login.
Select the menu item:
Edit | SubmitYou should see some text in the bottom message window indicating that the new room was successfully submitted to the MOO:

NOTE: if you're already graphically connected you won't see the new room until reconnecting, needs to be fixed.
Finally, you need to tell the MOO which rooms can be seen by line of sight from the new room and which of the other rooms can see the new room by line of sight. Double click on the new room. In the bottom of the dialog that pops up, there are two list boxes under the 'Room Adjacency List'. Select the rooms that can be seen from the room you double-clicked and move them to the right box. Repeat for all the other rooms in line of site of the new room.
In this case, in the dialog that pops up after double-clicking on the parallelogram room:
Move the octagonal room's id (62) to right hand side:
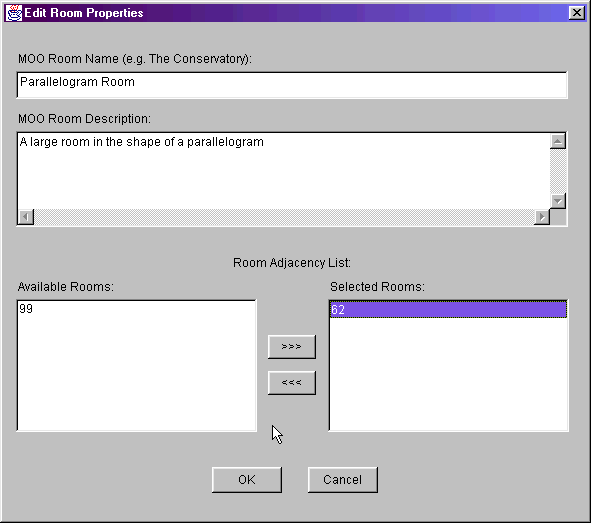
Do the same for the octagonal room, i.e. double-click on the octagonal room, but move the parallelogram room (99) to the right hand list.
Now Submit the changes (Edit | Submit Changes). Make sure you're logged in first of course.

NOTE: Since the first room is owned by wizard, you you must have programmer and wizard priveleges in order to build off of the first room. Otherwise, you need to own the room(s) you're building off of and be a programmer. Here's how you make someone a wizard:
@chparent #xxx to $wiz
@programmer #xxx
;#xxx.wizard=1
Now, connect to the world using ehwt/ehwtwin. You should see the tunnel you just created:
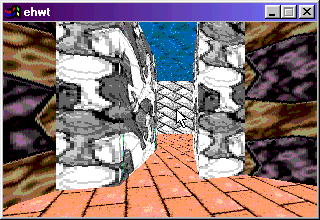
and be able to walk through it to the new room:
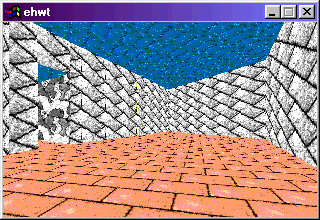
If you have a text connection open, you should see your text avatar move to the new room.
Finally, you need to set the default text player position. Graphically walk to the new room and in ehwt press 'x'. Note the avatar position and facing in the console. In your text session, type the following, replacing x,y,z and facing with the values in the console:
;here:set_text_player_default_location(x,y,z,facing)Now, test it out. Type 'southwest' in your text session to get to the first room. Your avatar should be in the default text position for that room (which you set in a previous step). Now, type 'northeast' to move back to the new room. Your avatar should be in the position you just specified for the default location for the new room.
See the ehed docs for more details on building graphical rooms.
@chparent yourchar to $builderTo create a graphical object, use the @create $gthing MOO command:
@create $gthing named mygthingYou now have mygthing in your inventory. Drop mygthing:
drop mygthingand then move away from your current position. You should see a globe where you were - this is the default graphical representation of an object:
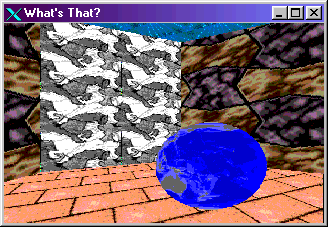
You can use objed to change the appearance of the object. When you drop an object, the object takes on a position and facing that matches the position and facing you had when you dropped the object. Now take the object back:
take mygthingThe globe should disappear.
graphical objects are $things with the event_flag set to 1. To make a non-graphical object graphical:
@setprop objectid.event_flag to 1By default, they have a zeroed-out position and facing, which means they'll be at wherever the 0 position is in your world. To move them to where you want them, just take the object and move to the position and facing you want the object to be and drop the object.
While you're here in the first room, it's a good time to take care of one small world-structure detail. Go to the middle of the room and press the 'x' key. Make a note of the numbers displayed in the xterm - e.g. avatar position (x,y,z) = (-1.89, 22.40, -4.00) avatar facing = 4.85
Now, logged in as wizard (as the owner of the room), type
;here:set_text_player_default_location(-1.89,22.40,-4.00, 4.85)using the numbers you recorded.
What this does is 2 things - it provides text-only players with a graphical position and facing for the benefit of graphics players, and it also defines the location that characters will have if they move to that room using standard text commands e.g. 'north'.
There are several complete sets of object facings in the eh_images directory. Each is a set of 8 facings of the form nameXXX, where XXX is an angle from 0 to 315 degrees. There are .gif and .ppm versions of each set:
@create $gthing named chairNote the object #
Start objed:
java objedSelect the menu item:
File | Select Facings...Navigate to the eh_images directory and choose a set of 8 facings (use the same type e.g. .gif) (hold down ctrl key to choose multiple files):
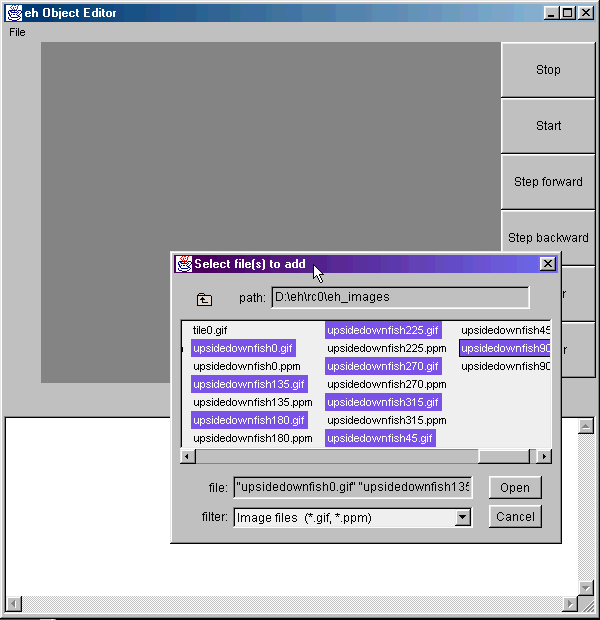
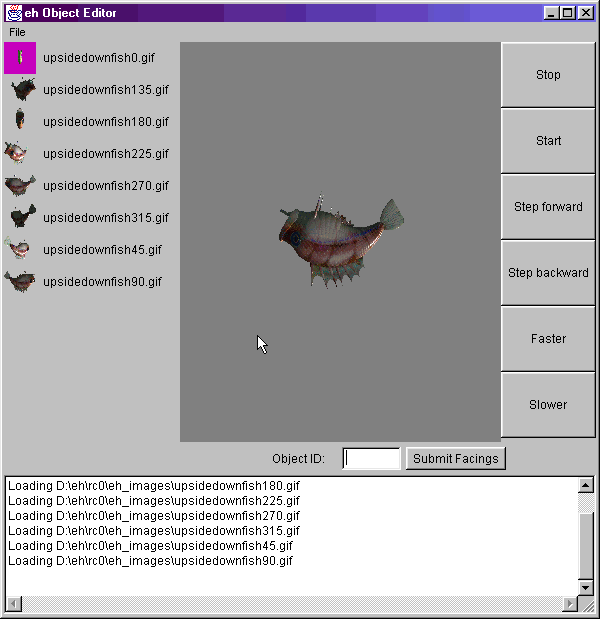
Thumbnail images should be shown one above another on the left, and the center should display a revolving object, which is what the object will look like in the MOO:
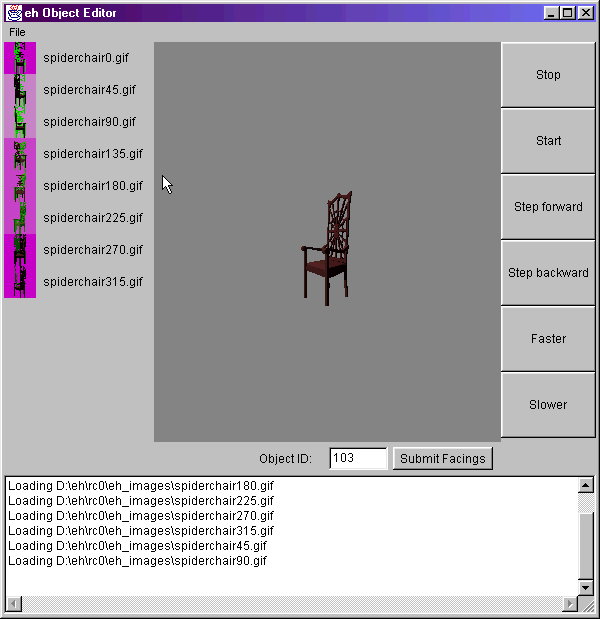
The images should be in order 0->315. If they're not, drag and drop thumbnails into the correct positions. Select the menu item:
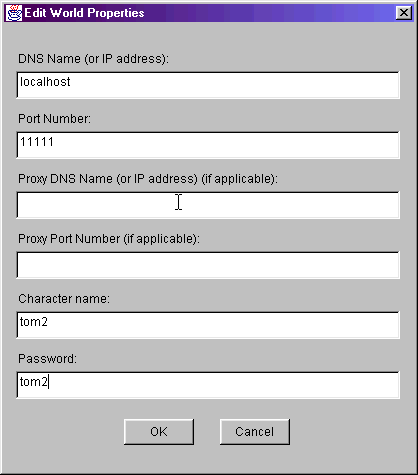
File | Connect To WorldFill out the DNS name and the port of ehMOO, and the character and password of your character:
Below the spinning object, fill in the ObjectID of the object in the world. Press the Submit Facings button to submit the facings to the MOO.
NOTE: there isn't really an indication as to whether the facincgs were actually changed on the MOO. You have to drop the object to see.
Now drop the object and look at it. It should now look like that object:
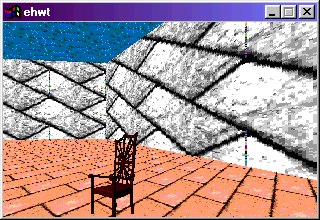
NOTE: you have to drop the object in order for the facings to be updated in ehwt.
Changing your own facings: Do the same using the object number of your character. Use the 'exam me' MOO command to find your object number.
create another character so you can see your new image:
@make-graphics-player steve steve@localhost
@new-password steve is steve
In your home dir, copy .ehwtrc to .ewhtrc.steve
Edit ehmoo.steve:
change the character and password to steve and steve, or whatever you made them.
Edit .ehwtrc.steve:
Change
ehwt_home /home/trz/ehwthometo
ehwt_home /home/trz/stevehomeAdd the line
addworld ehmoo.steveNow make a home for the new character and copy the necessary files:
mkdir stevehome
cd ehwthome
cp -ar * ../stevehome
cd ../stevehome
Edit home. Change the second to last line,
WORLD:ehmoo:62:home_doorto
WORLD:ehmoo.steve:62.home_doorNow in objed, change your facings to say, the upsidedownfish set:
Finally, connect using the steve char by starting ehwt:
ehwt -i .ehwtrc.steveWalk around and find tom - he should be an upside-down fish.
ehwtrcLocation /home/trz/ ehwtHomeLocation /home/trz/ehwthome/NOTE: make sure they end with /
ehwtrcLocation C:\Program Files\eh\ehwt\ ehwtHomeLocation C:\Program Files\eh\ehwt\home\NOTE: make sure they end with \
Now start ehed to edit angled.eh so we can add a portal to it:
java ehedSelect the menu item:
File | Open miniMOO WorldNavigate to the miniMOO subdirectory, and select angled.eh. A new rectangular room situated at an angle should appear in the right pane:
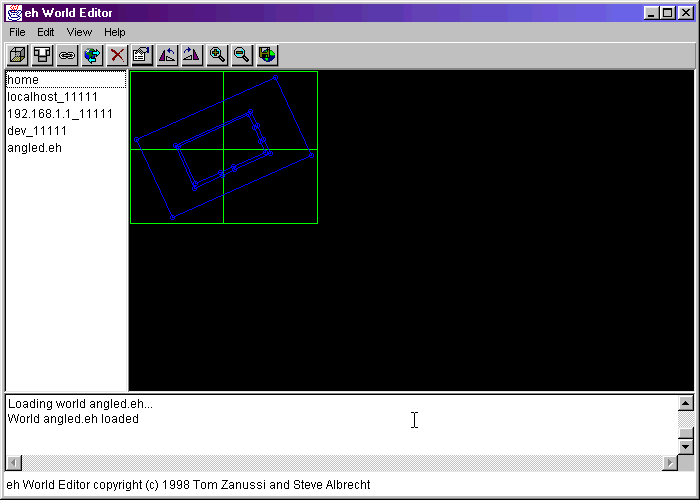
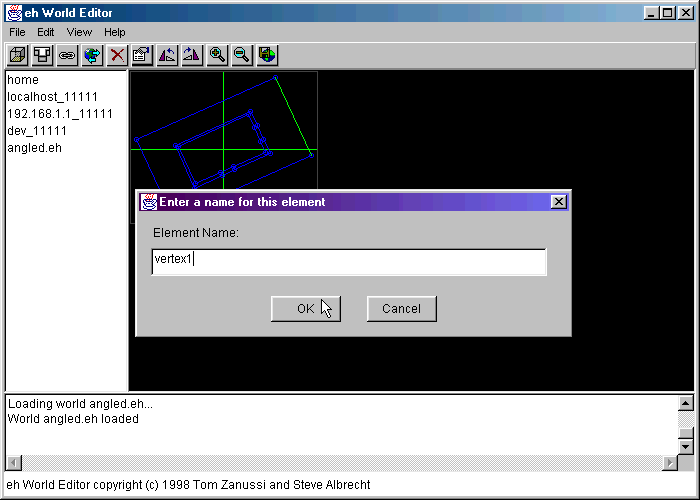
Add a vertex to the NE wall by pressing the ALT key and clicking on the position on the wall where you want the vertex; this will mark one side of a recessed doorway that will define a portal. Give it a name:
Add another vertex to the wall, then add two 'unattached vertices' not on the wall, in order to delineate a rectangular portal region, as such:
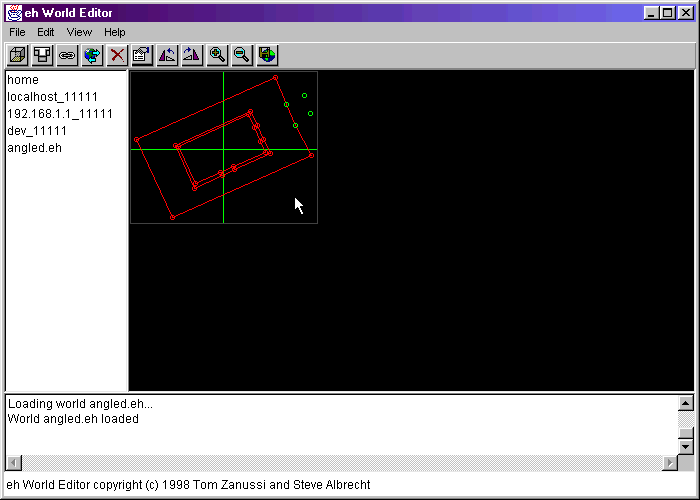
Now, select all 4 vertices (SHIFT+left click on each) and select the menu item:
Edit | Add new portalIn the dialog that comes up:
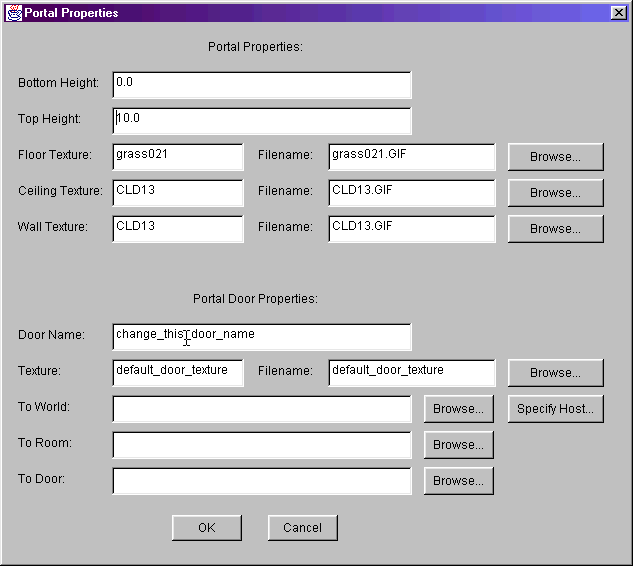
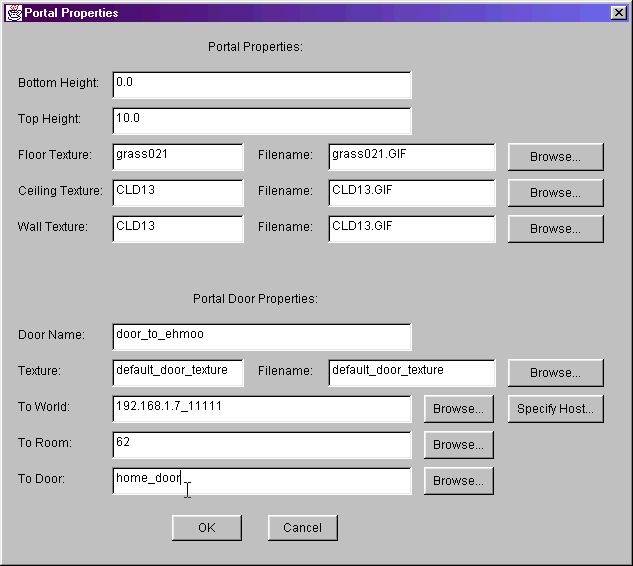
change the door name to something and specify the IP address and port number of the ehMOO or miniMOO you want to have the portal connect to, using the 'Specify Host...' button and subsequent dialog (you could also use the 'Browse...' button if the world you want to connect to is already in the world cache). Also, the door and room number of door in the world you'll be connecting to needs to be specified (your avatar will appear in that world/room/door when the connection is made.) In this example, we'll assume we have an ehMOO running at 192.168.1.7 port 11111 and the door we'll be entering will be the door named home_door in the ehMOO's room 62:
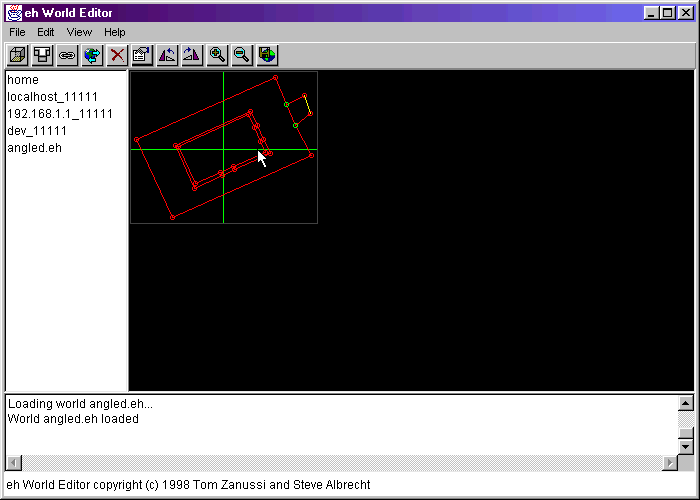
Pressing the OK button should result in a new portal in the home world, leading to the other world:
Now save the new miniMOO world by selecting the menu item:
File | Save miniMOO worldNow start miniMOO using the new world:
java miniMOO my.db angled.ehIf you don't already have a character, create one (log in as wizard, no password) e.g.
telnet localhost 7777
@make-player tom tom
Of course the character name and password should match the entries in the myminimoo world definition file. Due to a bug in the ehwt client, you'll need to log in as the character you created, and move it to 0 0 (the default for miniMOO is to start at 20 20, which is fine for the default homeworld but not angled.eh):
telnet localhost 7777
@move me to 0 0
If you don't do this the first time you connect, it starts at 20 20 which will not be within the bounds of the world. (you'll see only blackness or weird flickering if this is the case). Subsequent connections don't need this step because the new position will be saved.
Finally, connect to the newly modified room:
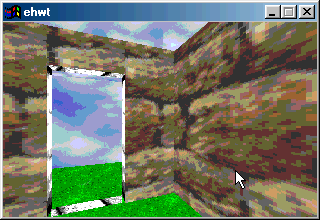
ehwtwin -c myminimooYou should see the new portal. Walking into it should cause your character to be 'teleported' to the world/room/door you specified. Here's an example of what it might look like:
